
Appearance
First Launch
Four things worth setting up the first time you open Otty. All of them live in Settings (⌘,) — no config files required.

1. Set Launch and New Tab / Window Options
We recommend setting On Launch to Restore Last Session, so when you open Otty the next time, your scrollback history will be restored, and code agents, like claude or codex, will be resumed automatically.
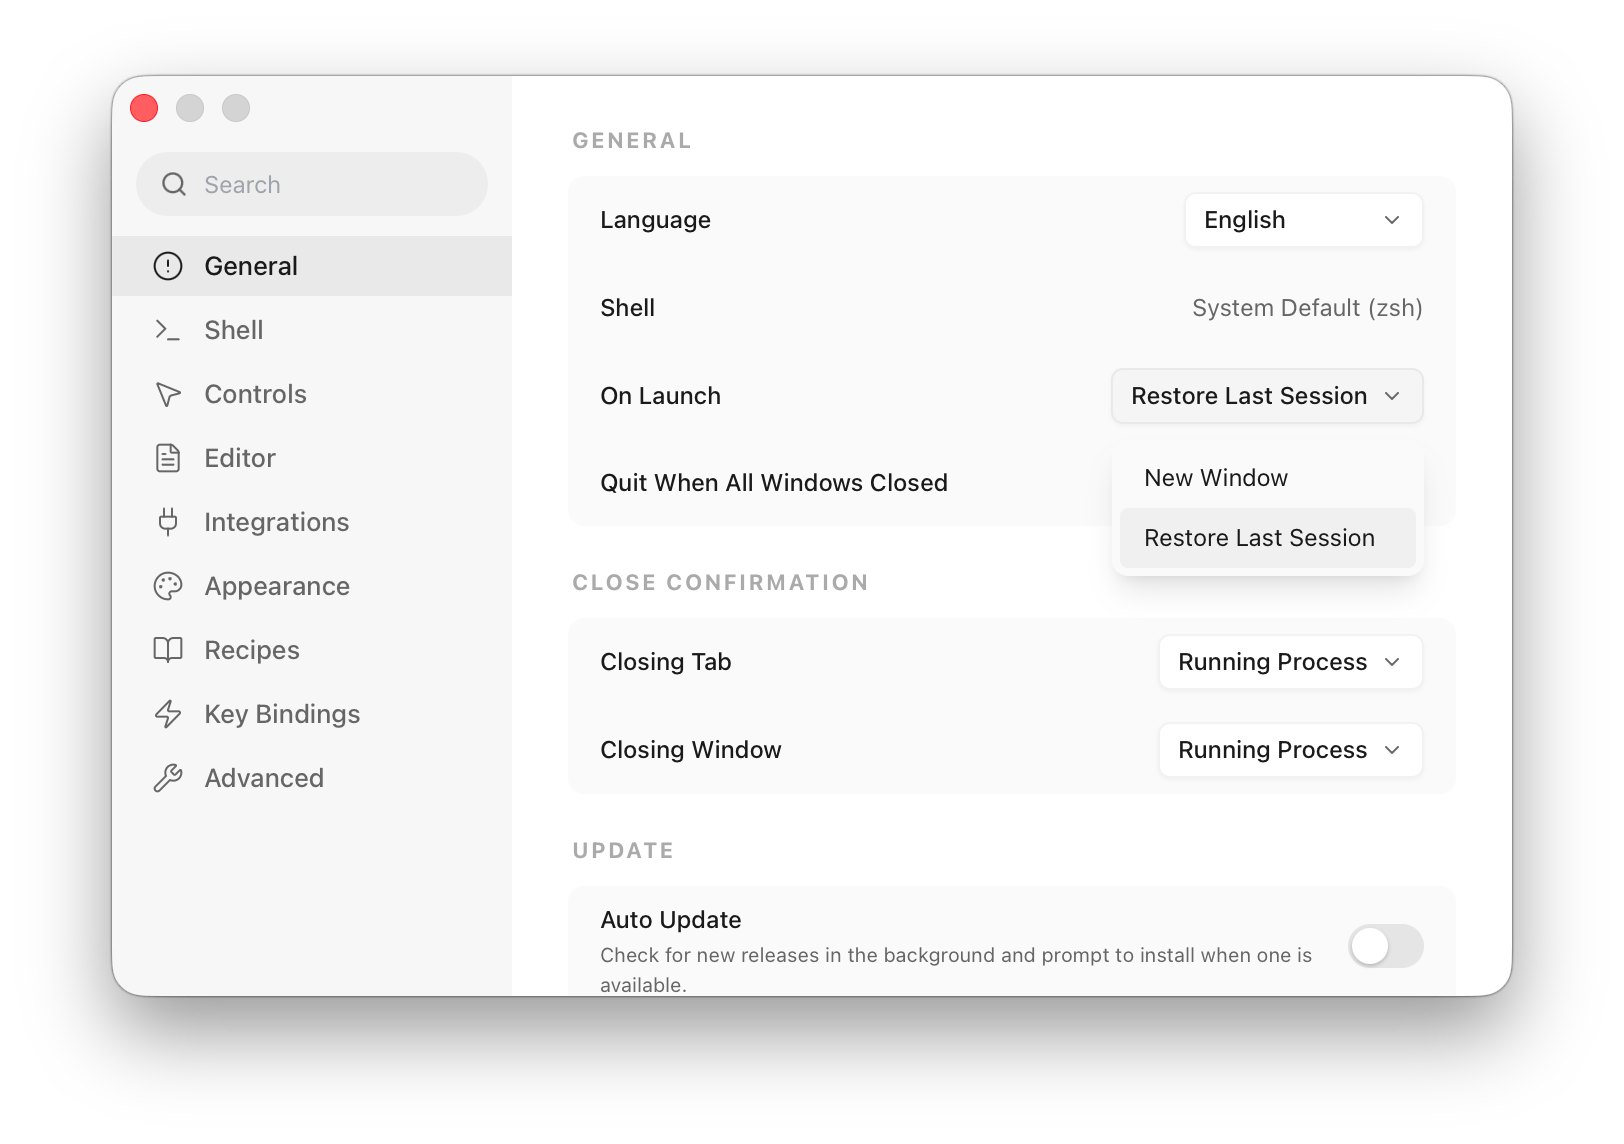
Next, you can configure whether the working directory will be inherited or not in a new window, tab, or split view in Settings → Shell → Working Directory.
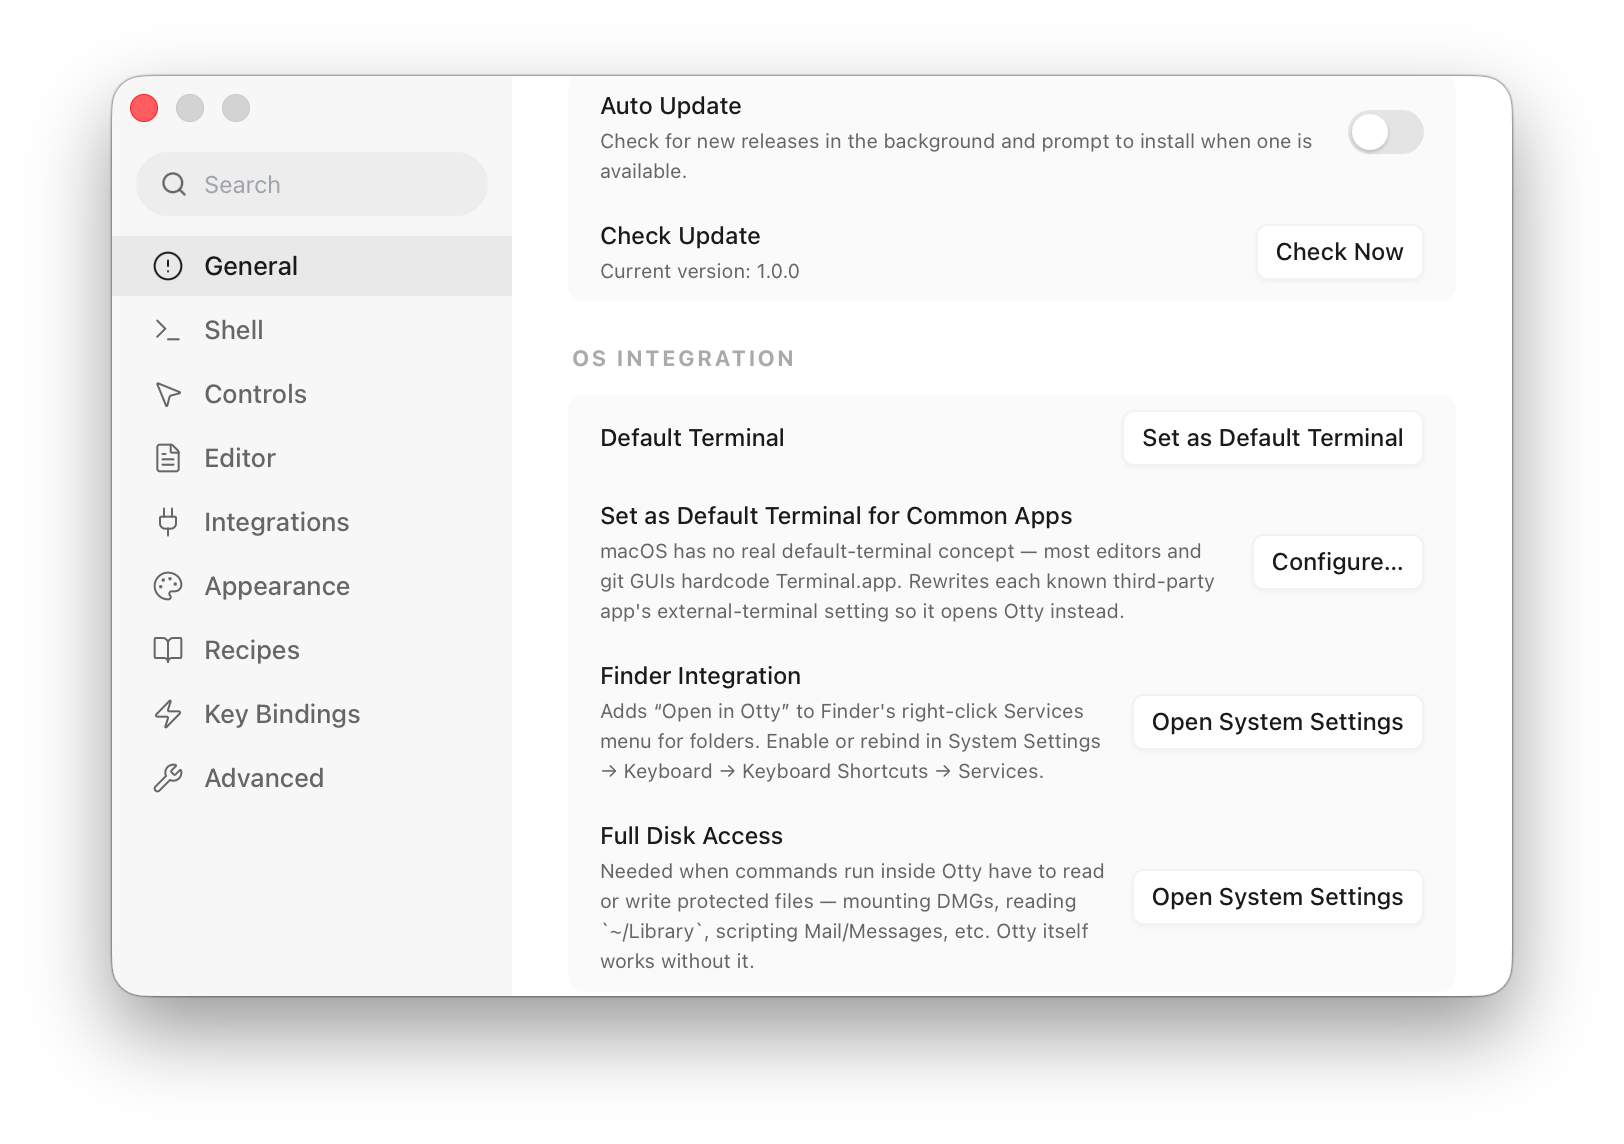
2. Set as Default Terminal
macOS has no real "default terminal" setting — but two separate things are worth doing:
- System default — used when Finder double-clicks a
.command/.tool/.shfile, when you runopen script.sh, or when something opens aman://orssh://link. - Editors & git GUIs — most of them hardcode Terminal.app or iTerm.app and ignore the system handler. Otty rewrites their per-app config so they launch Otty instead.
Settings → General → OS Integration:
- Click Set as Default Terminal to register Otty as the system handler.
- Click Configure… next to Set as Default Terminal for Common Apps to pick which third-party apps (VS Code, Cursor, Windsurf, Sublime Text, …) should open Otty. Apps you don't have installed are skipped; you can revert any of them later from the same dialog.
3. Install the Otty CLI (and skip the otty prefix)
The otty command lets you drive the app from any shell — open files in a pane, jump to recent folders, watch a long-running command, etc. It ships inside the app bundle but isn't on PATH until you install it.
Settings → Shell → Otty CLI:
- Install CLI — adds
/usr/local/bin/otty(asks for admin once). - Omit
ottyPrefix — toggle on so shells launched by Otty get plainedit,view,watch,jump, andlearnas shell functions. Typeedit foo.txtinstead ofotty edit foo.txt. - Allow Overwrite — leave off unless you already have your own
edit/view/etc. functions and want Otty to replace them.
CLI Quick Usage
sh
otty jump Workspace ## jump to folder XX, just like Zoxide or autojump
otty view readme.md ## view readme.md file directly in Otty window
otty watch build.sh ## run and watch the scripts, show notification when it is done


## When Omit `otty` Prefix, you can run directly
jump Workspace
view readme.md
watch build.sh
For the full command list see Workflows → Using the CLI.
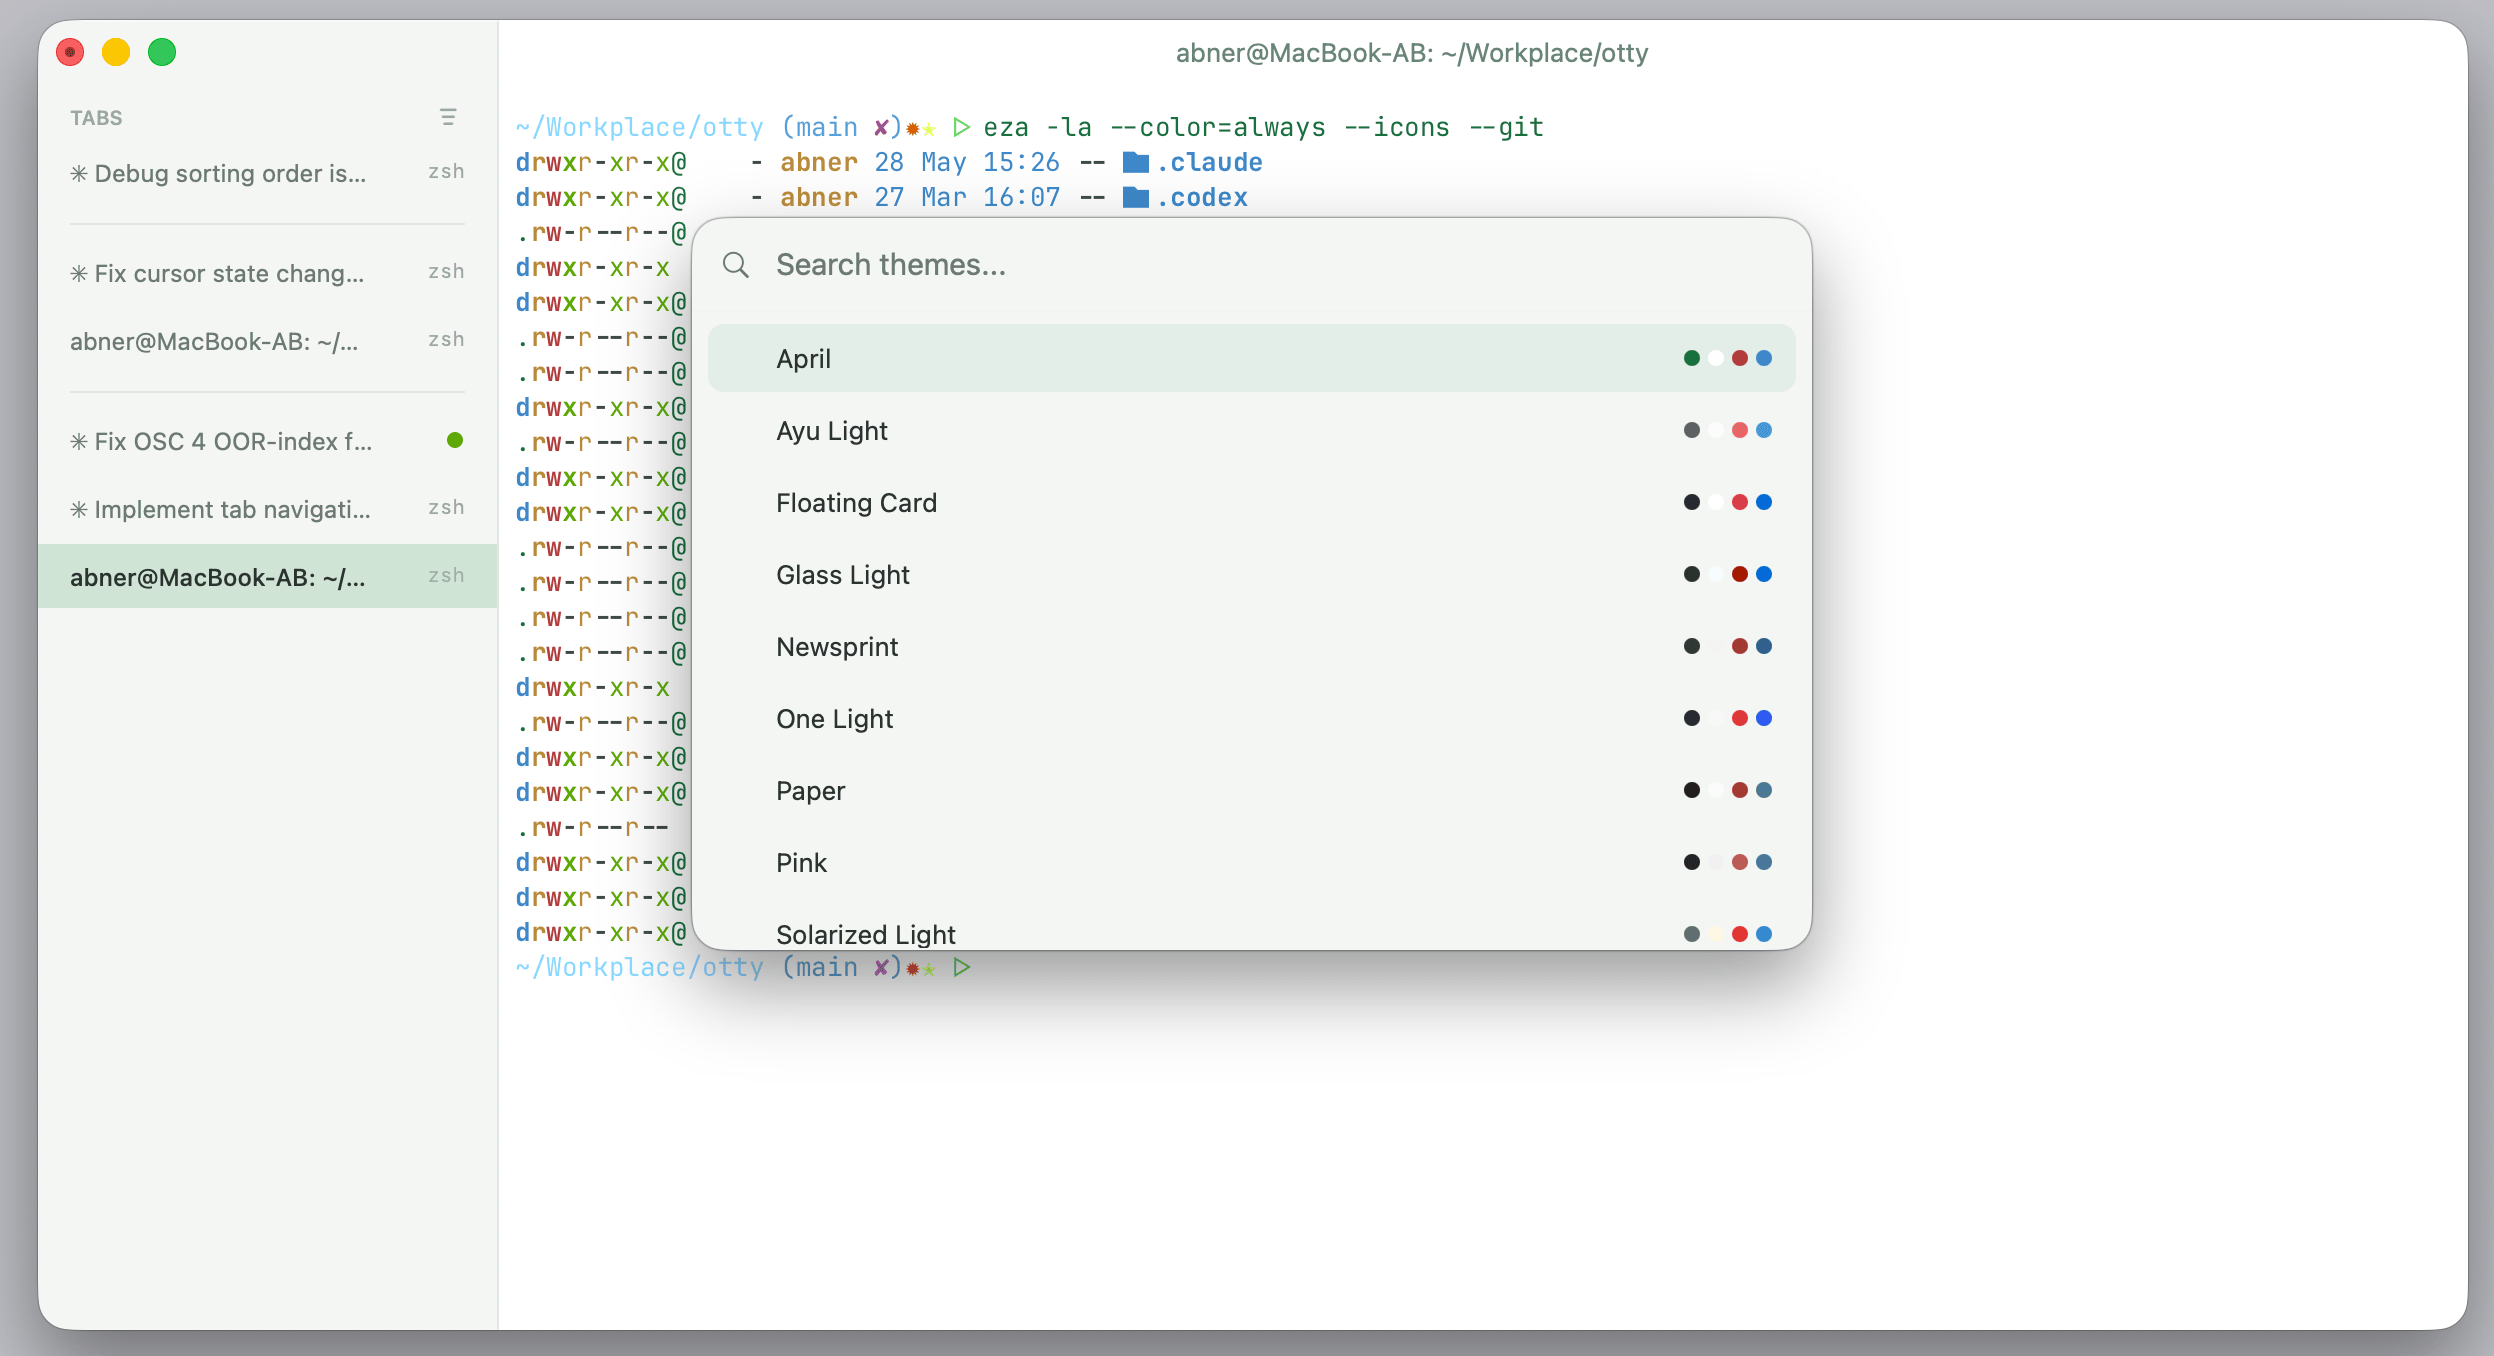
4. Change Theme
Pick a theme that you like.
You can open Command Palette (Command + Shift + P), type themes and press enter to see the themes list, use arrow up / arrow down to switch and preview the theme, then press enter to apply:
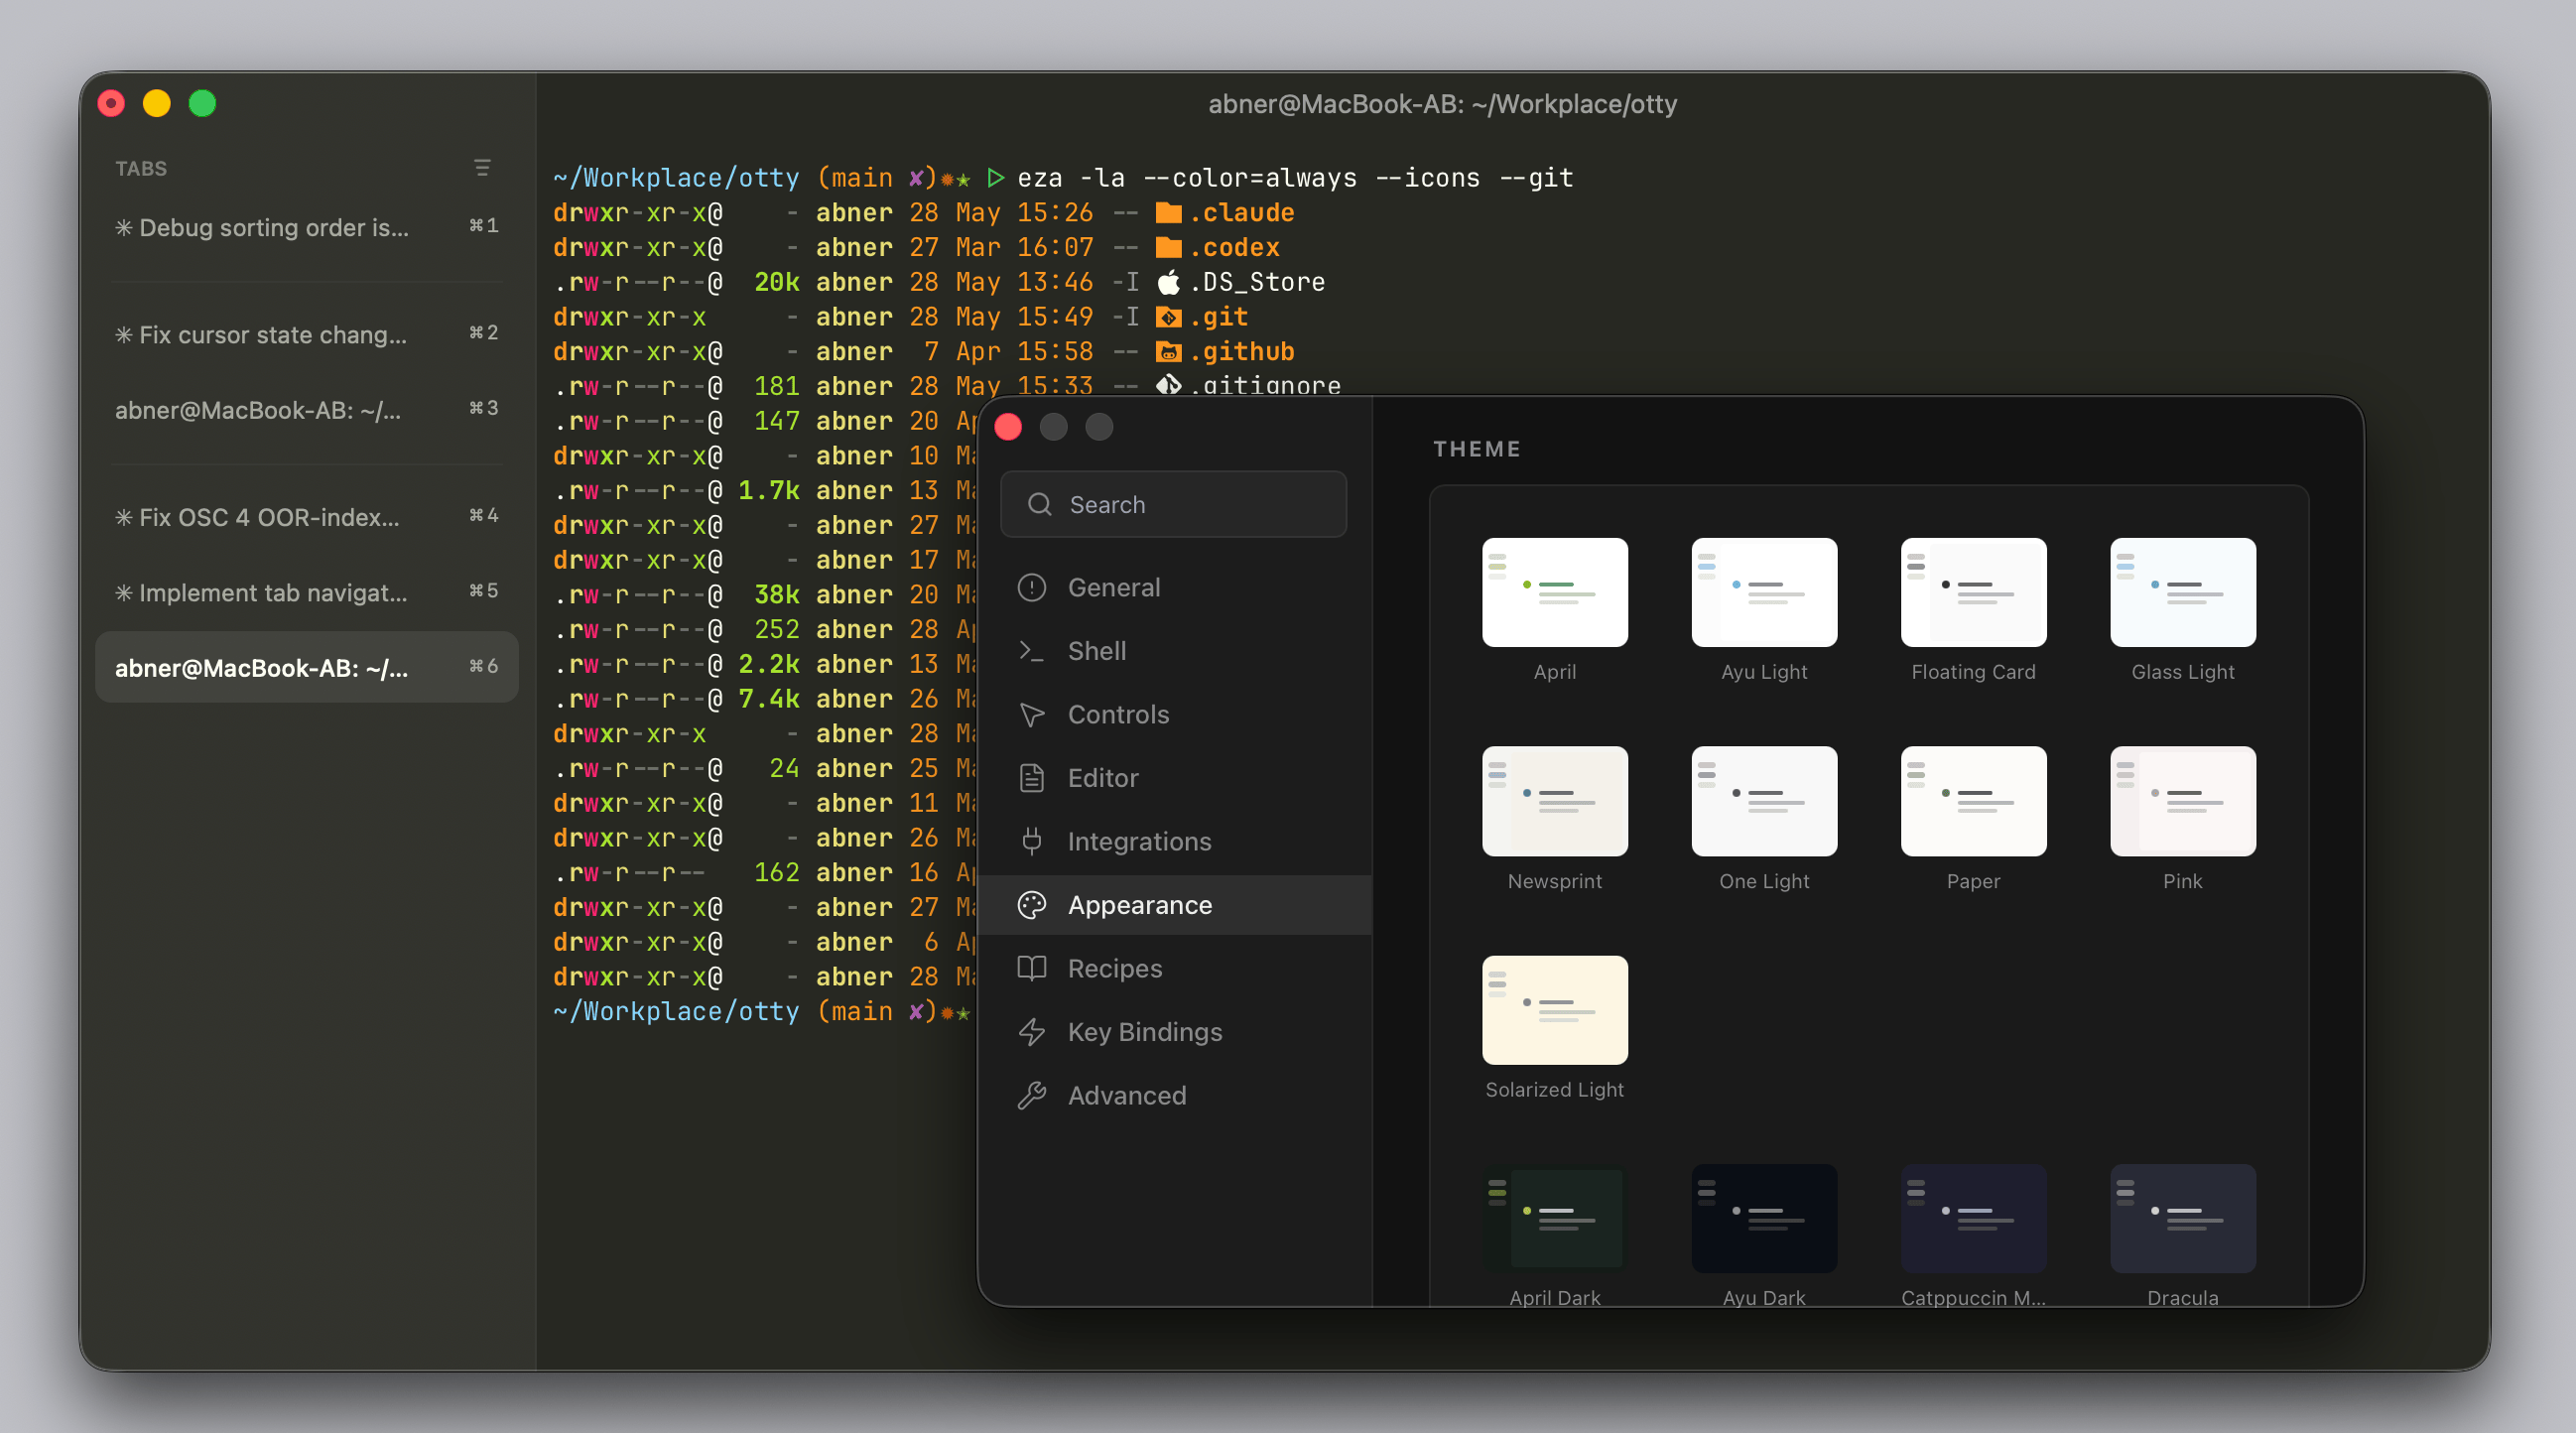
Or, you can open Settings → Appearance → Theme or even modify the theme's color, font, paddings, etc.
5. Install Agent Integration
If you use Claude Code, Codex, or OpenCode, Otty can show live state in the tab bar — running / awaiting input / task complete — and many other useful features for code agent scenarios.
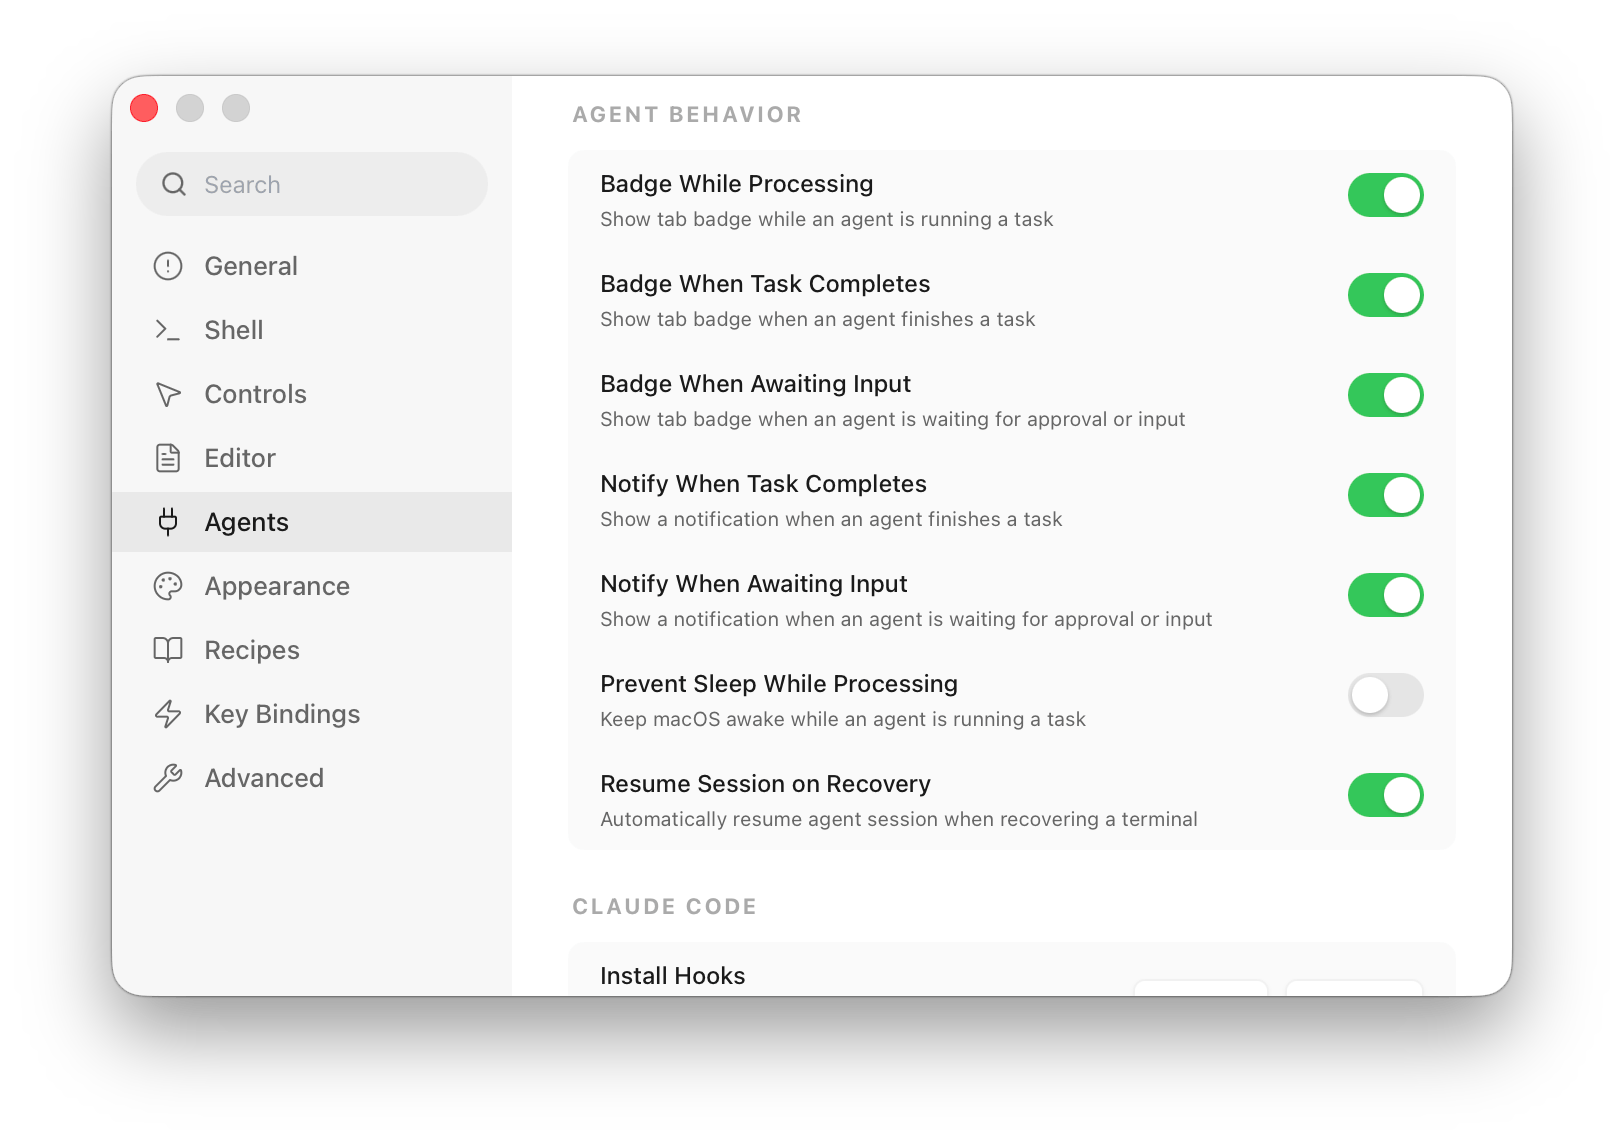
Settings → Agents:
- For each agent (Claude Code, Codex, OpenCode) you actually use, click Install in its card. This writes a small hook config under
~/.claude/,~/.codex/, or~/.config/opencode/plugins/that lets the agent stream its state back to Otty. - Under Agent Behavior, turn on the badges you want — Badge While Processing, Badge When Task Completes, Badge When Awaiting Input — and optionally Prevent Sleep While Processing.
- You can uninstall the hooks from the same card at any time; it cleanly reverts the config files.
For deeper config, see Agents → Setup.
Next steps
Now that Otty is set up, get comfortable with the everyday basics:
- Window, Tab and Split — organize your workspace into tabs and side-by-side panes.
- Copy and Paste — how text moves to and from the clipboard, plus the safe-paste guard.
- Command Palette — press
⌘⇧Pto run any action by name. - Autocomplete — inline suggestions for 700+ CLI tools as you type.
See also
- Installation — download and install Otty.
- Working with Code Agents — what the agent integration gets you.
- Using the CLI in your Shell — every
ottysubcommand and flag.